
Spooky Season Bracelet
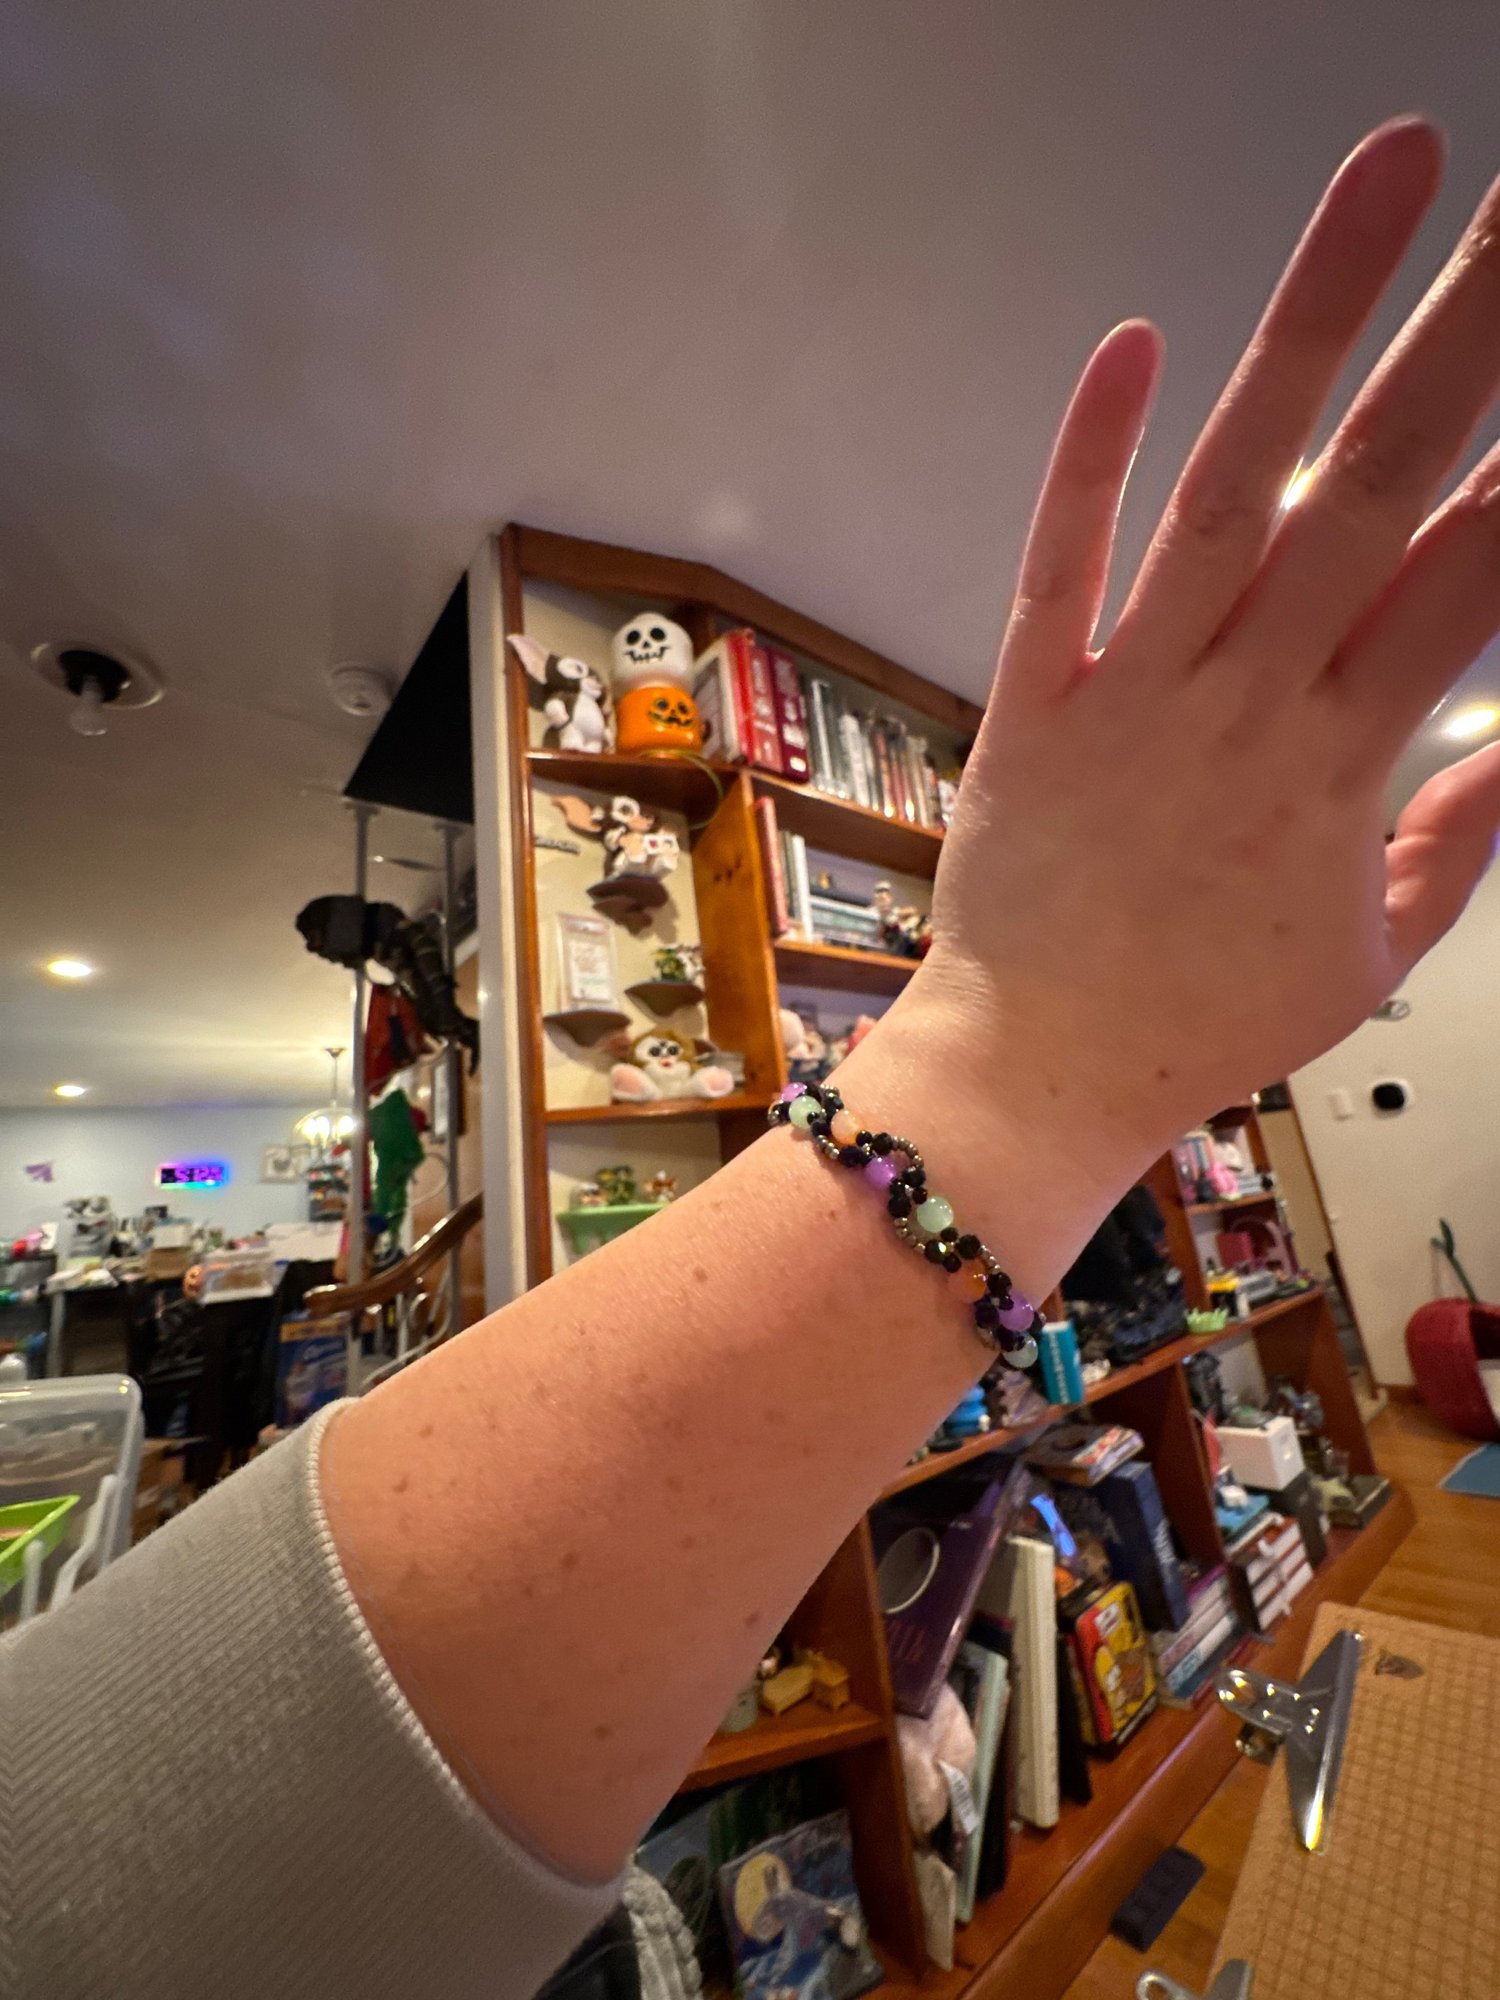
A two-needle cross weave: one thread, a needle on each end, and every unit locks together where the needles cross through a shared bead. The result is a chain of linked ovals that alternate sides, so the bracelet has a soft wave down its length.
Before you start
Materials and tools
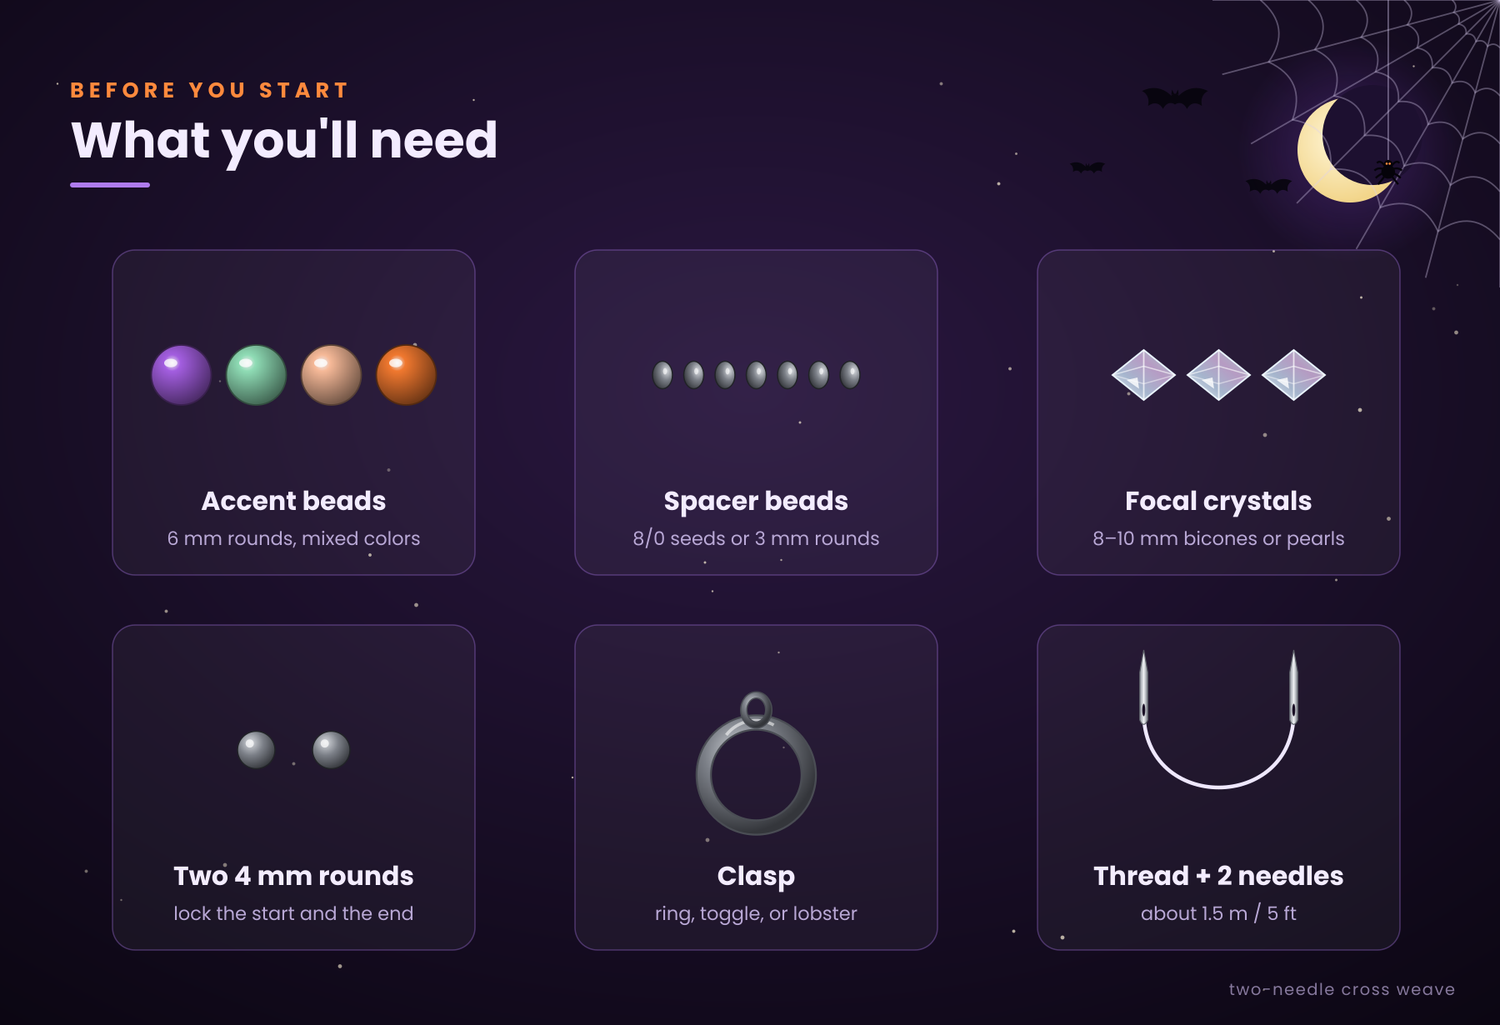
The pattern uses three bead roles. Any colors work as long as you keep the sizes consistent.
- Accent beads (the crossing beads): 6 mm round In my version: mixed stones in purple, mint green, peach and orange.
- Spacer beads: size 8/0 seed or 3 mm round In my version: gunmetal seed beads plus black faceted rounds.
- Focal beads: 8 to 10 mm round In my version: clear AB crystals.
You'll also need
- Beading thread or thin cord Nylon or braided, about 1.5 m / 5 ft for a 7 in bracelet. Cut more than you think you need.
- 2 beading needles
- 2 small 4 mm rounds to lock the start and end
- A clasp Ball-and-loop, toggle, or lobster clasp plus ring.
- Scissors and clear jewelry glue A dab of G-S Hypo Cement or clear nail polish.
Step 1
Anchor the clasp
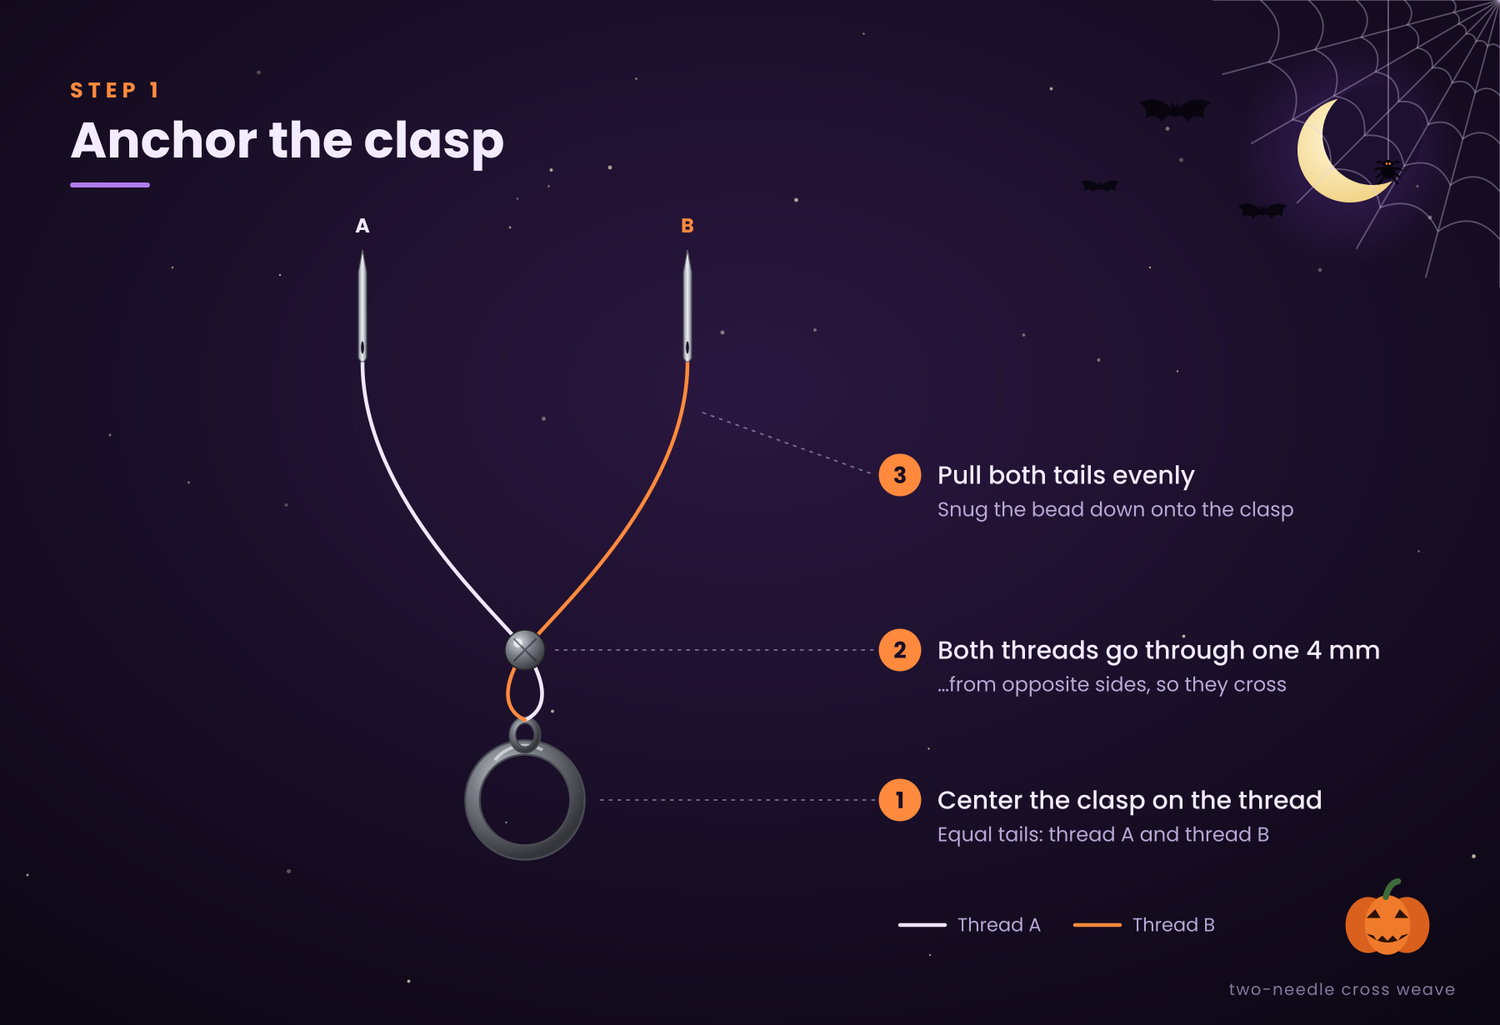
The clasp hangs from the center of your thread, and a single crossed bead locks it in place.
- Thread a needle onto each end of your thread.
- Slide one half of the clasp (its loop or ring) to the exact middle of the thread. You now have two equal working ends, left and right.
- Pick up one 4 mm round with the left needle.
- Pass the right needle through that same bead from the opposite side, so the two threads cross inside it.
- Pull both ends evenly until the bead sits snug against the clasp. This crossing move is the one you'll repeat for the whole bracelet.
Step 2
Weave the repeating unit
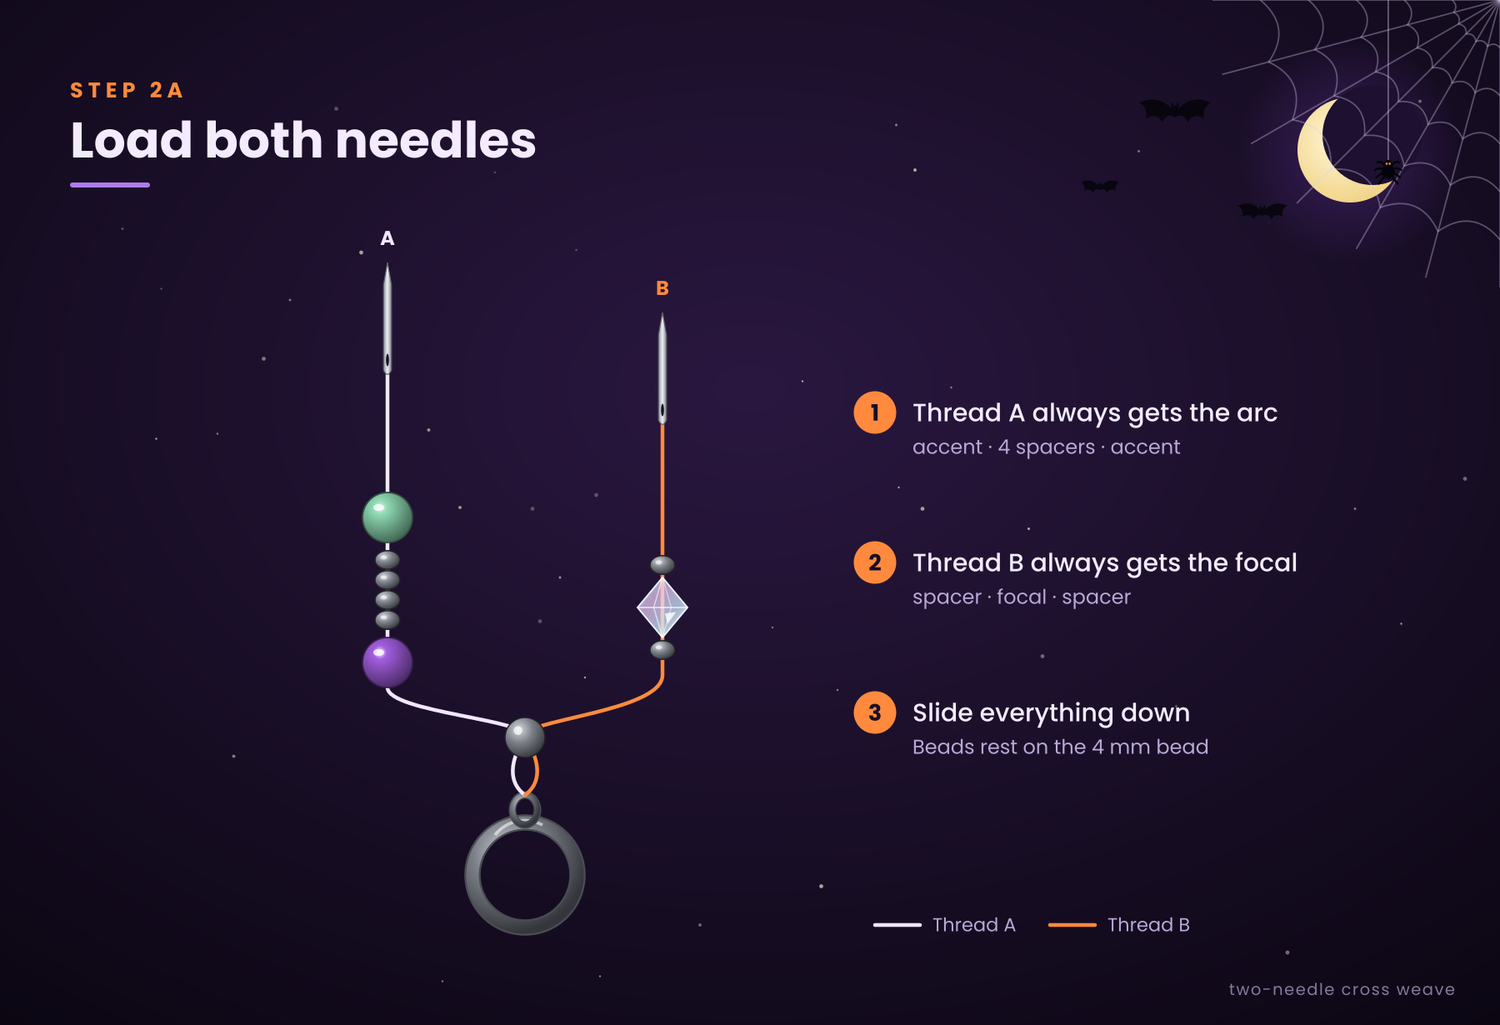
Each unit is two short strands joined by one cross. Repeat it until the bracelet reaches your wrist length minus the clasp.
- Load the left needle: 1 accent bead, 4 spacer beads, 1 accent bead.
- Load the right needle: 1 spacer bead, 1 focal bead, 1 spacer bead.
- Cross: pass the right needle through the last accent bead on the left strand, going in from the opposite side. Both threads now run through that one bead.
- Snug it up: pull both ends gently and evenly. The two strands curve into a closed oval, with the focal bead on one side and the arc of spacers on the other.
- Repeat: start again at step 1 with whichever needle is now on the left. Because the threads trade places at each cross, the focal bead lands on alternating sides. That's what creates the wave.
Check your tension every unit. Too loose and the ovals flop open; too tight and the bracelet curls and won't lie flat.
Step 3
Finish and secure
The end mirrors the start: one crossed bead, then the second half of the clasp.
- After your last unit, pick up one 4 mm round on one needle and cross the other needle through it, just like Step 1.
- Pass both needles through the other half of the clasp from opposite sides.
- Tie the two ends together in a tight square knot right against the clasp.
- Weave each end back through the last two or three units, following the existing thread path, and tie a half-hitch knot between beads.
- Add a tiny dab of glue to each knot, let it dry, then trim the tails close.
Extra credit
Tips and variations
- Rotate your accent colors. In my version, cycling purple, mint, peach and orange stones gives a confetti look against the black and gunmetal.
- Swap the focal bead. Pearls read classic; faceted clear crystals catch light and make the piece feel lighter.
- Measure as you go. Wrap the work around your wrist every few units rather than counting on a set number.
- Keep the thread from twisting. Let the work dangle and spin free every few units.